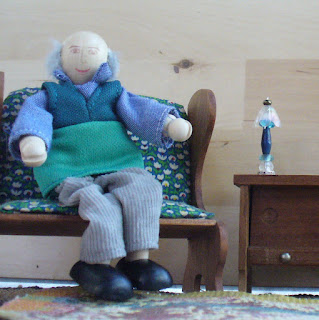
You can make a really fancy little lamp using beads and beading wire. Basically you take a straight stick and add whatever beads you want. The bottom bead should be wide and flat so that the lamp will stand up. Near the top is one that is shaped like a flower or lampshade. Above the lamp shade bead put one or two beads to top things off, then see if you like the arrangement. Once you have the lamp you want, you can take the beads off and put them back on the wire. This time put a dot of super glue between each bead. Snip off any extra wire at the top when it is all dry and you have made a pretty lamp in just minutes! Once we figure out what to do with the big bamboo piece that my son insisted was perfect for his farmhouse lamp I will add more photos!
Showing posts with label dollhouse furniture. Show all posts
Showing posts with label dollhouse furniture. Show all posts
Tuesday, July 31, 2012
Little Beaded Lamps
You can make a really fancy little lamp using beads and beading wire. Basically you take a straight stick and add whatever beads you want. The bottom bead should be wide and flat so that the lamp will stand up. Near the top is one that is shaped like a flower or lampshade. Above the lamp shade bead put one or two beads to top things off, then see if you like the arrangement. Once you have the lamp you want, you can take the beads off and put them back on the wire. This time put a dot of super glue between each bead. Snip off any extra wire at the top when it is all dry and you have made a pretty lamp in just minutes! Once we figure out what to do with the big bamboo piece that my son insisted was perfect for his farmhouse lamp I will add more photos!
Thursday, July 19, 2012
Gumball Dome Tiffany Lamp
I cut tissue paper into very small pieces and glued it to the shade, leaving tiny spaces between pieces. I used regular tacky glue for this. I put the glue on a small section of lampshade and covered it with tissue scraps (a wet finger works well for picking them up.) After each small section I would take a break and do something else before continuing so that section could dry.
When the shade was covered with tissue and dry, I filled in the spaces with a thick black Sharpie (permanent pen). For the base I glued a nail through a small button and then glued the whole thing onto a washer. There are lots of other bases you could make. You could use other found hardware items,or rig something up with pipe cleaner and bottle cap or whatever you can find laying around the house that looks elegant enough to sport a Tifffany lampshade. I used modeling clay to wedge the shade onto the nail head, dug out one of the adorable staff members from my childhood dollhouse for a formal touch, and the lamp is complete!
Monday, May 21, 2012
Simple Dollhouse Sofas

Here's how to do it:
First, you will need
- Take a small kitchen sponge and cut an inch off the length.
- Wrap this piece and the larger piece in the fabric of your choice. Use fabric glue or a hot glue gun to attach the fabric, using straight pins to hold it in place while the glue dries. Wrap it like a present. Trim excess fabric so it isn't bulky and try to tuck in edges so it lies as flat as possible against the sponge.
(and some straight pins)

(We tried a "wavy" sponge for this tutorial, which is just a little bit more work, than the straight sponge. You just have to be sure to pull the fabric tightly against the waved edge.)
- Glue the smaller sponge, onto the large sponge, making a back for the couch. (at this point, it was easy for the 4 & 6 year old to really get involved. Glue and hold is a good job for them!) Let it set a few minutes to dry.
- We added "Rick Rack" to this couch, and some fancy trim to one (below) , but you could also leave a trim off completely. The fancy trim turned out to be a bit of a nuisance because it totally frays where it is cut and it is hard to glue down all the little loose pieces without having it show on the front of the sofa. If you use trim, you may want to use something that will cut with a neat edge, not something bulky and inclined to majorly unravel.
- Pillows- for such a tiny sofa we decided the pillows do not need stuffing. Just sewing two squares of felt together makes a cute, easy pillow.
The fancy trimmed couch.
Looks pretty good, even if it's a little extra trouble.
Labels:
children,
couch,
diy,
dollbed,
dollhouse,
dollhouse furniture,
easy,
furniture,
kids,
miniatures,
play,
sofa,
tutorial
Subscribe to:
Posts (Atom)


.jpg)


.jpg)